Essential vs Optional Equipment: What New Home Lifters Actually Need
Quick Answer
New home lifters actually need only a small set of multi-use tools that cover the fundamental movement patterns: a quality exercise mat, a set of resistance bands with door anchor, and ideally one pair of adjustable or fixed dumbbells. Everything else—benches, racks, specialised machines, and large weight collections—is optional and should be added only after consistency and progressive overload with the basics are established. Starting minimal reduces cost, storage problems, and decision fatigue while still allowing years of effective strength training.
Why Most New Home Lifters Buy Too Much
The excitement of starting often leads to purchasing equipment that looks impressive but is rarely used. Large racks, extensive dumbbell sets, cable machines, and specialty bars consume space and budget while delivering little additional benefit for beginners. The result is clutter, financial regret, and sometimes abandonment of training altogether. The more effective approach is to identify the minimum equipment that allows progressive loading of the squat, hinge, push, pull, and carry patterns, then expand only when a clear limitation appears.
Essential Equipment for New Home Lifters
| Item | Why It Is Essential | Patterns Covered | Storage Demand | Progression Potential |
|---|---|---|---|---|
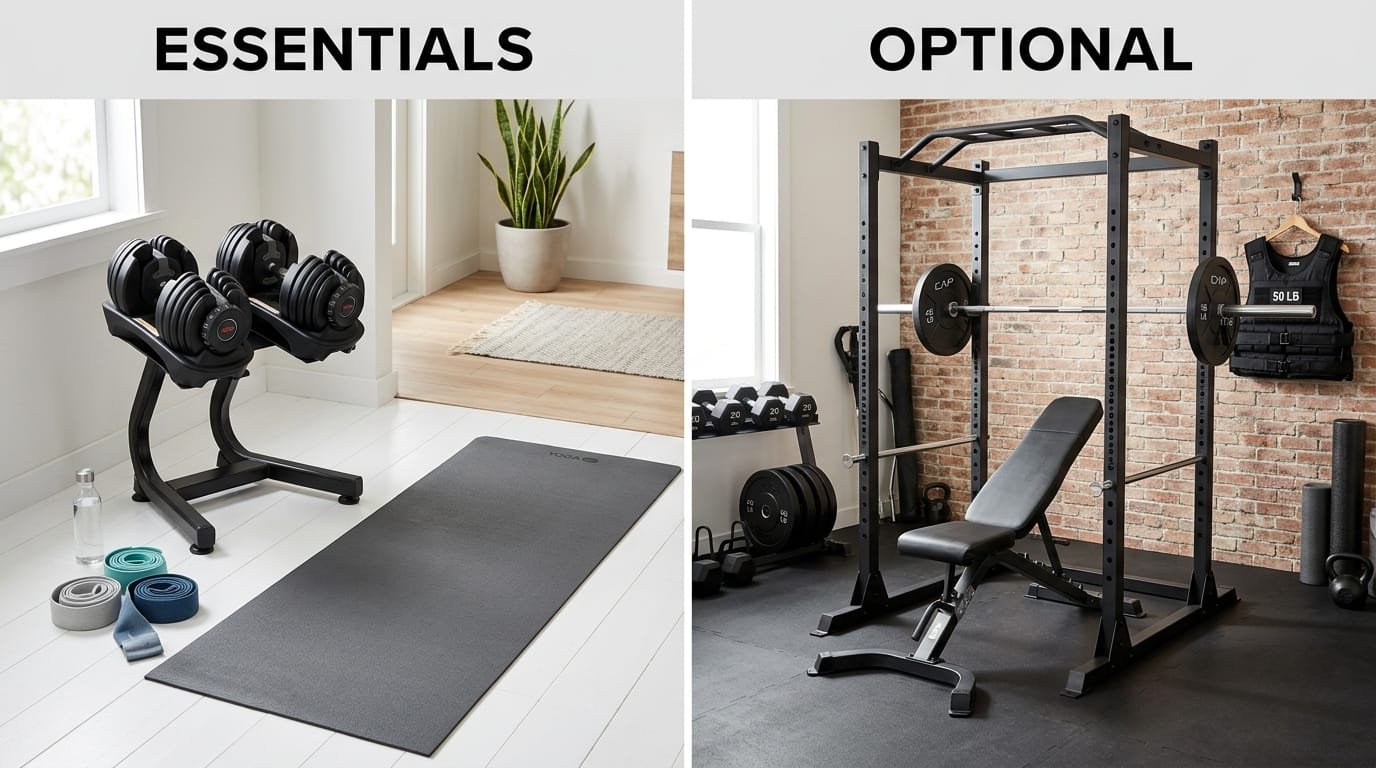
| Exercise mat | Comfort, joint protection, defined training zone | All floor-based work | Low (rolls up) | Supports consistent practice |
| Resistance bands + door anchor | Variable resistance, portability, joint-friendly loading | Squat, hinge, push, pull, core | Very low | High (band strength, stretch, tempo) |
| Adjustable or fixed dumbbells (one pair) | External load for most patterns | Squat, hinge, push, pull, carry | Low–moderate | High (load, tempo, unilateral) |
These three items enable full-body progressive training in almost any living situation.
Optional Equipment and When It Becomes Useful
| Item | When It Becomes Worth Adding | Main Benefit | Storage & Cost Consideration |
|---|---|---|---|
| Suspension trainer | When inverted rows or adjustable-angle work is desired | Excellent pulling and core options | Very low storage |
| Kettlebell (single) | When swings, goblet work, or different loading is wanted | Unique hinge and conditioning stimulus | Low |
| Foldable bench | When supported pressing or hip thrusts are limited by floor options | Comfort and variety for pressing | Moderate – only if storage is solved |
| Pull-up bar or sturdy doorway solution | When vertical pulling becomes a priority | Direct lat and grip strength | Low–moderate |
| Additional dumbbell pairs or adjustable set with higher range | When current top weight is no longer challenging | Continued linear loading | Higher storage and cost |
| Power rack or squat stand | When barbell squats and heavy loading are long-term goals | Safety and loading potential | High space and cost |
| Cable machine or functional trainer | Rarely necessary for most home lifters | Constant tension and exercise variety | Very high space and cost |
Optional items should solve a specific, demonstrated limitation rather than being purchased in anticipation of future needs.
Movement-Pattern Coverage with Minimal Equipment
Squat / Lunge
Bodyweight squat, goblet squat with dumbbell, band-resisted squat, reverse lunge, Bulgarian split squat using a chair.
Hinge
Romanian deadlift with dumbbells, single-leg Romanian deadlift, glute bridge, band good-morning, kettlebell swing (if available).
Push
Push-up variations, floor press with dumbbells, band chest press.
Pull
Band rows, single-arm dumbbell rows, suspension inverted rows, band face pulls and pull-aparts.
Carry and Core
Suitcase carry with dumbbell or loaded bag, dead bug, plank variations, bird dog.
Shoulder-friendly technique remains important as loads increase (Bent Arms vs. Straight Arms in Lateral Raises, The Hidden Mistake in Lateral Raises, and 3 Lateral Raise Modifications). Grip strength develops through rows and carries and can be trained more specifically later (Do Hand Grippers Really Work?).
Step-by-Step Equipment Acquisition Plan
- Begin with bodyweight only and a mat if the floor is hard or cold.
- Add a set of resistance bands with a door anchor within the first 2–4 weeks.
- Introduce one pair of dumbbells (adjustable or fixed) once bodyweight and band versions of the main patterns feel manageable.
- Train consistently with this toolkit for at least 8–12 weeks while applying progressive overload through reps, tempo, pauses, and unilateral variations.
- Identify the first real limitation (for example, inability to overload rows further or desire for overhead pressing support).
- Add the single item that solves that limitation.
- Repeat the process: master the new capacity before considering further purchases.
- Avoid buying multiple items at once.
- Prioritise storage solutions at every step so equipment does not take over living space.
- Reassess needs every 3–6 months based on actual training, not aspirational plans.
Progressive Overload Without Constant New Equipment
New lifters can progress for many months without additional gear by using:
- Added repetitions
- Slower eccentric tempos
- Paused repetitions
- Increased range of motion
- Unilateral versions of exercises
- Shorter rest periods or density methods
- Stronger bands or the next dumbbell increment when available
These methods keep training effective while the essential toolkit remains small.
Storage and Living-Space Considerations
Essential equipment must store easily:
- Bands fit in a drawer or hang on over-door hooks.
- A single pair of dumbbells fits under a bed or in a closet.
- A mat rolls and stands in a corner or closet.
Optional equipment should be held to the same standard. If an item cannot be stored out of sight or in a dedicated, acceptable location, it is usually not worth adding yet.
Common Equipment Mistakes New Home Lifters Make
| Mistake | Result | Better Approach |
|---|---|---|
| Buying a full gym setup immediately | High cost, clutter, decision fatigue | Start with mat + bands + one dumbbell pair |
| Purchasing single-purpose machines | Low use, high space cost | Multi-use tools only |
| Ignoring storage before buying | Living-space conflict | Measure and plan storage first |
| Chasing novelty over progression | Inconsistent stimulus | Master progressive overload with current tools |
| Upgrading too early | Unnecessary expense | Wait for a clear, repeated limitation |
| Neglecting technique while adding gear | Injury risk | Form first, equipment second |
Strength training with minimal effective equipment remains highly productive (strength training guidance). Practical home-gym approaches emphasise starting lean and expanding only with demonstrated need (home gym equipment prioritisation and budget home gym principles).
Frequently Asked Questions
What is the absolute minimum to start?
A clear floor space and bodyweight. A mat and resistance bands make the process more effective and joint-friendly.
Are adjustable dumbbells worth the cost for beginners?
Yes if budget allows. One pair replaces many fixed weights and stores compactly. Fixed light-to-moderate pairs are a reasonable alternative.
Do I need a bench to begin?
No. Floor presses, push-up variations, and hip thrusts on the floor cover the same patterns for beginners.
When should I consider a pull-up bar?
When vertical pulling becomes a priority and you can perform inverted rows or band-assisted variations with good control.
Is a kettlebell necessary if I have dumbbells?
No. It offers useful variety but is optional. Master dumbbell and band versions first.
How long can I progress with only bands and bodyweight?
Many months, especially when tempo, pauses, unilateral work, and density methods are applied systematically.
What equipment gives the best return on investment?
Resistance bands with door anchor and a pair of adjustable dumbbells. These two cover the largest number of patterns with the least space.
Should I buy used equipment?
Often yes for dumbbells, kettlebells, and benches, provided condition and safety are verified. Bands are usually best purchased new.
Final Recommendation
New home lifters actually need far less equipment than most marketing suggests. A mat, resistance bands with a door anchor, and one pair of dumbbells form a complete, progressive toolkit that supports years of strength development. Everything beyond that list is optional and should be added only after consistent training reveals a specific limitation. Starting minimal reduces cost, protects living space, and forces focus on the fundamentals of technique and progressive overload.
Acquire the essentials first, train consistently with full-body sessions, and apply non-load progression methods for at least 8–12 weeks. When a genuine limitation appears, add the single item that solves it. This disciplined approach produces better long-term results and a home training environment that remains sustainable. Begin with the minimum effective set—the strength gains will follow without the clutter.