Pull-Up Bar for Doorways: Safety, Weight Limits, and Installation Tips
Quick Answer For most people in 2026, a no-screw leverage-style doorway pull-up bar rated for at least 300 lb is the practical choice for apartments and rentals. Models such as the Iron Gym Total Upper Body Workout Bar or Ultimate Body Press Elevated XL remain strong performers when installed correctly on solid wood door frames with adequate trim. Always treat manufacturer weight ratings as static limits—dynamic movements and kipping significantly increase forces. Prioritize frame integrity, proper seating of the bar, and a controlled test hang before every session. If you weigh near or above 200 lb or plan heavy or dynamic training, strongly consider a wall-mounted alternative.
Why a Doorway Pull-Up Bar Makes Sense (and When It Doesn’t)
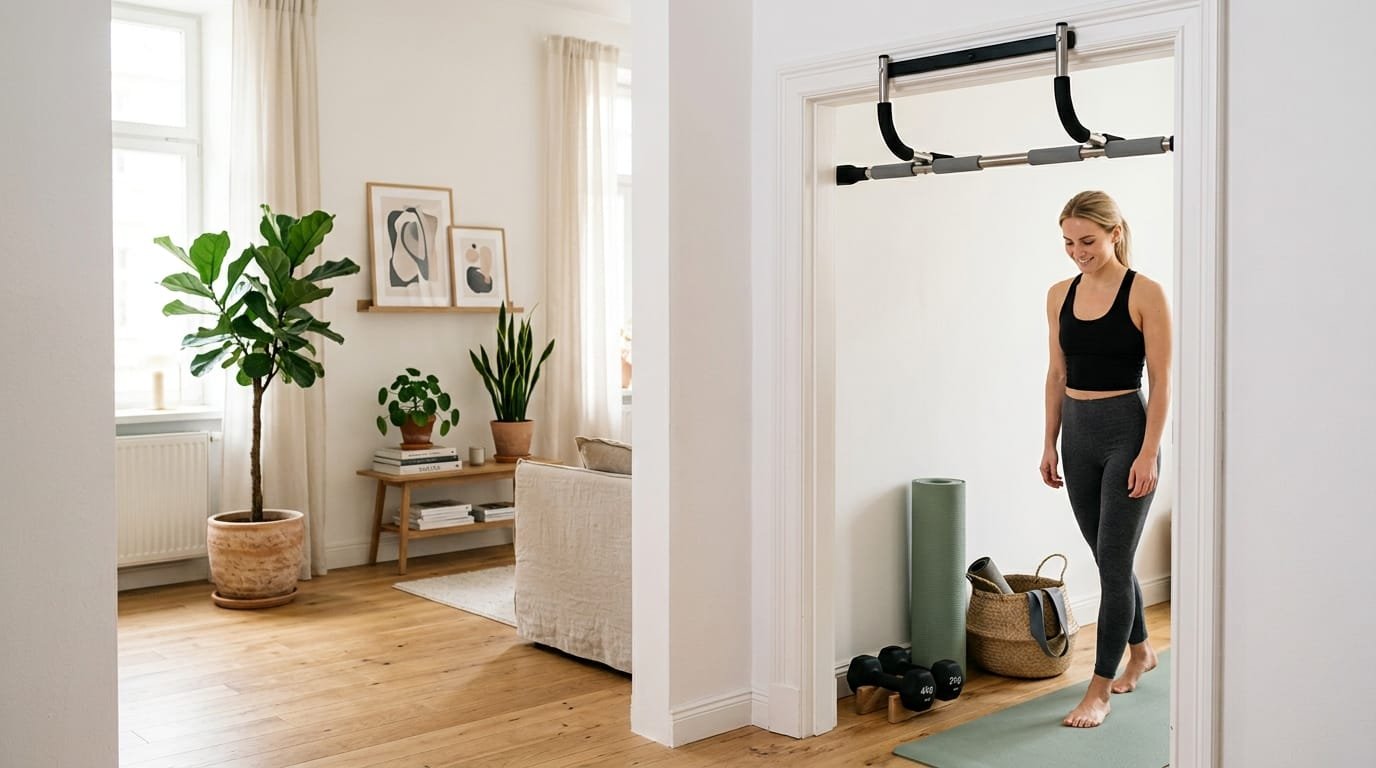
A doorway pull-up bar delivers one of the highest returns on investment for upper-body strength in a small space. It requires no drilling, stores in seconds, and supports pull-ups, chin-ups, hanging leg raises, and scapular work. When paired with adjustable dumbbells, a weight bench, or an adjustable kettlebell, it completes a highly functional minimalist setup.
However, these bars rely on leverage and friction against the door frame and trim. They are not equivalent to a bolted wall mount or power-rack pull-up station. Safety depends heavily on the quality of your door frame, correct installation, and disciplined use. Independent testing from sources including Wirecutter and Garage Gym Reviews consistently emphasizes that the bar is only as strong as the frame it sits on.
Understanding Weight Limits: Static vs. Real-World Forces
Most popular doorway bars list capacities of 250–300 lb, with some newer models claiming 400–440 lb. These numbers almost always refer to static hanging weight.
Dynamic forces during pull-ups are higher. Controlled pausing at the bottom or continuous strict reps can generate peak forces of roughly 1.4–1.7 times body weight. Kipping or swinging multiplies those forces further. A 180 lb user performing continuous strict pull-ups can approach or exceed a 300 lb rating. A 200+ lb user should treat most standard doorway bars as borderline or unsuitable for regular heavy use.
Practical guidelines:
- Under 160 lb and performing strict, controlled reps → most 300 lb bars are fine when properly installed.
- 160–200 lb → choose higher-rated models and avoid dynamic movements.
- Over 200 lb or planning weighted or kipping work → move to a wall-mounted or rack-mounted bar.
Always leave a safety margin. The rating is for the bar itself; your door frame and trim may fail first.
Key Safety Features and Frame Requirements
What the bar needs:
- Solid steel construction with minimal flex
- Thick, secure foam or rubber contact pads
- Multiple grip positions (wide, narrow, neutral) for joint-friendly training
- Clear fit range that matches your doorway
What your doorway needs:
- Solid wood frame (not hollow-core or thin MDF trim)
- Adequate protruding trim/molding for the rear hooks or leverage arms to seat against
- Width within the bar’s adjustable range (commonly 24–32 or 24–36 inches)
- No loose, cracked, or previously damaged trim
- Enough overhead clearance for full arm extension without hitting the top of the frame or ceiling
If the top trim flexes when you press on it, do not use a leverage-style bar there. Painted MDF trim is a common failure point under repeated loading.
Step-by-Step Installation Guide
- Measure the inside width of the doorway and the depth/protrusion of the top trim. Confirm the bar’s stated range.
- Inspect the frame and trim for cracks, looseness, or soft spots. Press firmly on the top molding.
- Clean contact surfaces so pads grip properly.
- Assemble the bar fully and tighten all hardware before mounting.
- Hook the rear portion over the top of the door frame/trim exactly as the manufacturer instructs. Center the bar left to right.
- Lower the front section so the side pads or arms press firmly against the frame and wall.
- Perform a controlled safety test:
- Push downward on the bar with both hands while feet remain on the floor.
- Progress to a partial hang (one foot still touching the ground).
- Only then perform a short, controlled full hang.
- Listen and feel for any shifting, creaking, or rotation. If anything moves, remove the bar and reassess the frame or choose a different doorway.
Repeat a quick push-down test before every training session. Pads compress over time and frames can settle.
Protecting Your Door Frame and Walls
- Use the manufacturer’s protective pads or add thin non-slip liner material.
- Avoid swinging the bar into place; set it carefully.
- Remove the bar when not in use if possible, especially in high-traffic doorways.
- Expect minor paint compression with regular use; deep dents or cracks indicate an unsuitable frame or improper setup.
- For rentals, document the condition of the doorway before first use.
Recommended Approaches by User Type
Beginners and lighter users (under ~180 lb) A multi-grip leverage bar in the 300 lb class (Iron Gym style or similar) offers excellent value and variety. Focus on strict form and progressive volume.
Heavier users or those wanting more confidence Look for higher-rated models or transition to a wall-mounted bar that bolts into studs. The extra security is worth the installation effort.
Tall users Elevated designs (such as the Ultimate Body Press Elevated XL) provide better head clearance and a more natural hanging position.
Renters or temporary setups Stick with true no-screw leverage bars and prioritize frames that will not be damaged. Avoid any model that requires permanent mounts.
Integrating Pull-Ups into a Broader Home Program
Pull-ups are a foundational vertical pulling movement. Progress them alongside horizontal pulls (rows with dumbbells or bands) and pressing work. Use resistance bands for assistance if you cannot yet perform full bodyweight reps. Maintain strong grip endurance and scapular control—apply the same principles discussed in our lateral raise form guides.
A doorway bar also supports hanging core work and decompression hangs that complement lower-body training with a kettlebell or cardio sessions on a manual treadmill.
Common Mistakes That Lead to Problems
- Installing on weak, hollow, or damaged frames
- Skipping the progressive load test
- Performing kipping or swinging movements on a leverage bar
- Ignoring pad wear or frame changes over time
- Choosing a bar whose width range only barely matches the doorway
- Assuming the published weight limit accounts for dynamic forces
Frequently Asked Questions
Are doorway pull-up bars safe? Yes when the frame is solid, the bar is correctly installed and tested, and movements stay controlled. They are less forgiving than wall- or rack-mounted options.
Will a doorway bar damage my door frame? Proper use on a suitable solid-wood frame usually causes only minor paint compression. Weak trim or improper installation can cause cracking or loosening.
What weight capacity do I need? Choose a bar rated well above your body weight and avoid dynamic movements that multiply forces. When in doubt, go higher or switch to a mounted bar.
Can I do kipping pull-ups or muscle-ups on a doorway bar? Generally no. Most leverage designs are intended for strict, controlled repetitions only.
How often should I check the installation? Before every session. A quick downward push test takes seconds and prevents most issues.
What if my doorway has no trim or very shallow molding? Leverage bars will not seat securely. Consider a different doorway, a pressure-style bar (with caution), or a wall-mounted solution.
Are elevated bars better? They often provide improved clearance and a more comfortable hanging position, especially for taller users, at the cost of a larger profile.
Final Recommendation
A well-chosen, correctly installed doorway pull-up bar remains one of the most practical ways to train vertical pulling strength in a small or rental space. Select a multi-grip model with a realistic weight rating for your body size, install it only on a solid frame, and treat every session with a brief safety check. Progress with strict form, assisted variations when needed, and complementary horizontal pulling and pressing work.
If your body weight, training style, or door-frame quality push the limits of a leverage bar, invest in a properly mounted alternative. The goal is consistent, safe training—not the most convenient piece of equipment at any cost.
Measure your doorway, inspect the frame, choose a bar that fits both your dimensions and your body weight with margin, and begin with controlled hangs and partial range work. Consistent practice on a secure bar builds the strength and confidence that transfer to every other upper-body movement.