How to Know If Your Form Is Good Enough Without a Trainer Watching
Quick Answer
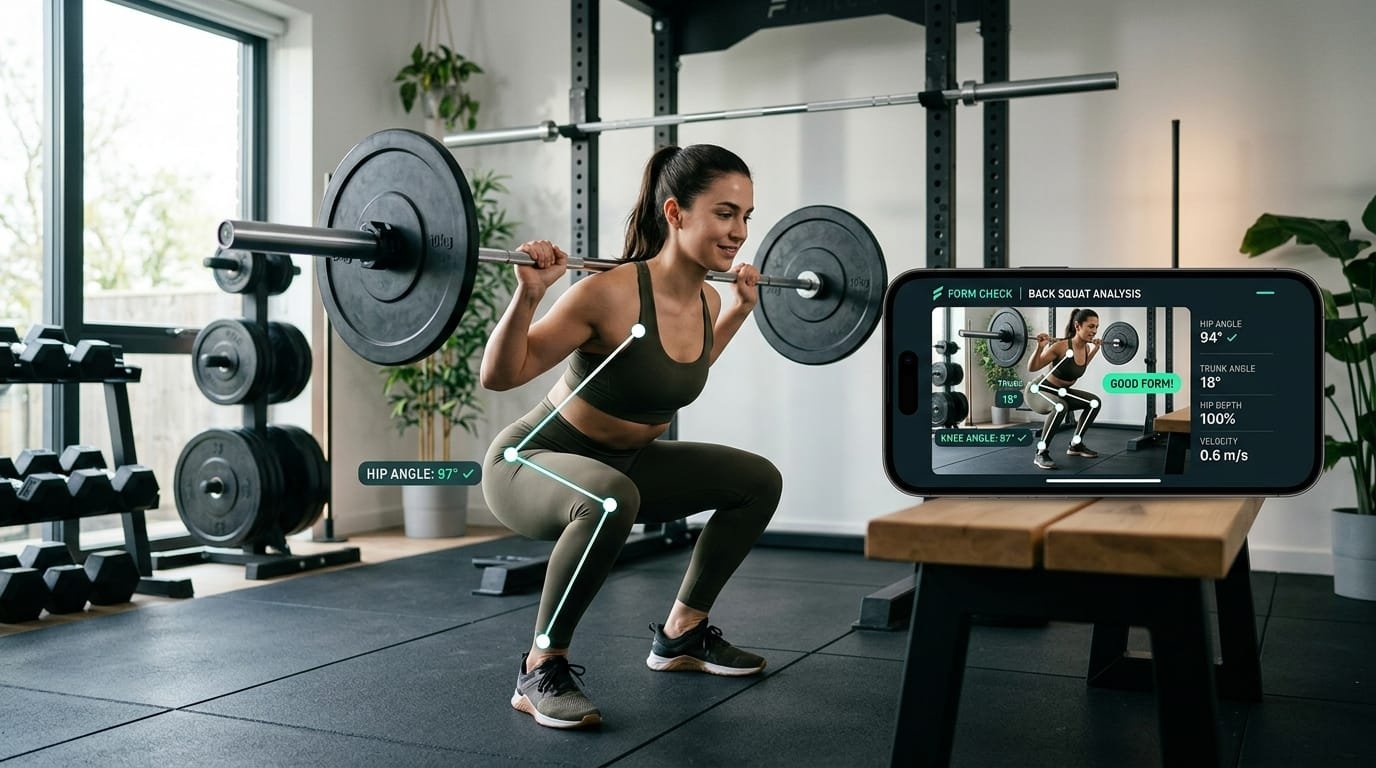
You can reliably assess your form without a trainer by filming sets from key angles, using a simple movement checklist for each pattern, comparing your video to trusted technique references, and monitoring joint feeling and bar or body path. Good form is consistent, controlled, pain-free, and repeatable across the set. If the movement looks stable on camera, matches the main technical points, and produces no warning sensations, it is good enough to progress.
Why Self-Assessment of Form Matters at Home
Home trainees rarely have real-time coaching. Without objective feedback it is easy to develop small technique errors that limit progress or irritate joints over time. The good news is that modern phones make high-quality video feedback available to everyone. Combined with clear technical standards and a systematic review process, self-assessment can bring form quality close to what many trainees receive from in-person coaching.
Core Principles of Reliable Self-Assessment
- Video is non-negotiable in the learning phase – Memory of how a set felt is less accurate than footage.
- Checklists beat vague impressions – Specific joint and position criteria remove guesswork.
- Consistency across the set matters – Form that only looks good on the first two reps is not yet solid.
- Pain-free and controlled are minimum standards – Any sharp or growing discomfort requires regression.
- Progress only when the standard is met – Load or volume increases come after technique is repeatable.
- Reassess periodically – Form can drift as loads rise or fatigue accumulates.
Essential Filming Setup for Accurate Feedback
| Element | Recommendation | Why It Helps |
|---|---|---|
| Angle | Side view for most lifts; front or 45° for others | Shows spine position, joint alignment, and bar path |
| Distance | Full body visible with some margin | Captures overall posture and balance |
| Height | Camera at roughly mid-torso height | Avoids distorted perspective |
| Lighting | Bright enough to see joint positions clearly | Prevents missed details |
| Device | Phone on a stable surface or cheap tripod | Eliminates shaky footage |
| Timing | Film working sets, not just warm-ups | Reveals form under real fatigue |
Review footage soon after the session while the feeling of the set is still fresh.
Pattern-Specific Form Checklists
Squat / Goblet Squat / Box Squat
- Feet planted and balanced
- Knees track roughly in line with toes
- Spine stays neutral (no excessive rounding or over-arching)
- Hips and knees bend together
- Depth is controlled and pain-free
- Weight stays mid-foot to heel
Hinge / Romanian Deadlift
- Spine neutral from head to pelvis
- Hips move backward first
- Soft knees, not locked or excessively bent
- Bar or dumbbells stay close to the legs
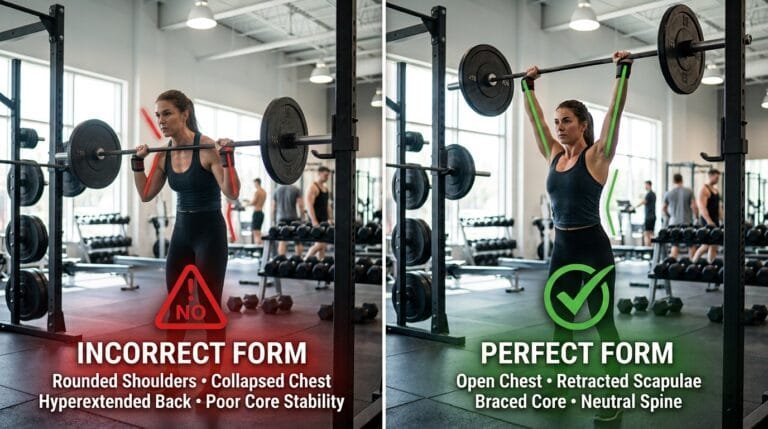
- Shoulders remain packed, not shrugged
- Movement reverses by driving the hips forward
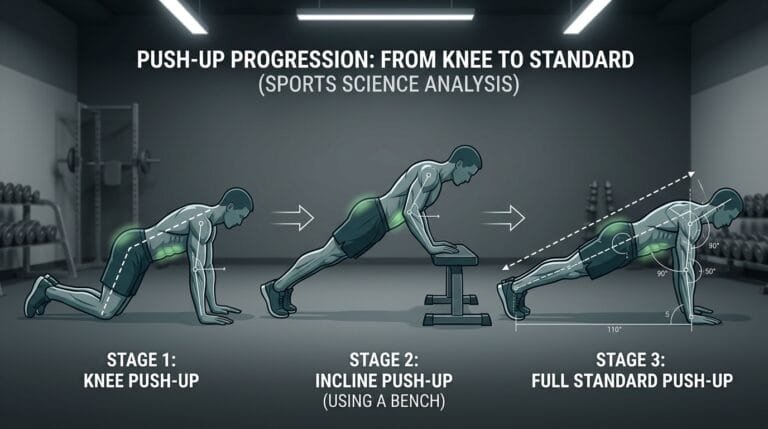
Push (Push-Up, Floor Press, Dumbbell Press)
- Body forms a straight line (push-up) or stable bench/floor position
- Elbows at a sustainable angle (not excessively flared)
- Shoulder blades move under control
- Full range is pain-free
- Lowering phase is deliberate
Pull (Row Variations)
- Spine neutral
- Scapula initiates the movement
- Elbow path is controlled
- No excessive torso rotation or momentum
- Shoulder stays down and back at the end of the pull
Carry
- Upright torso
- Level shoulders
- Steady, controlled gait
- Grip secure without excessive tension elsewhere
Shoulder position and control are especially important during pressing and raising movements (Bent Arms vs. Straight Arms in Lateral Raises, The Hidden Mistake in Lateral Raises, and 3 Lateral Raise Modifications). Grip and forearm tension should stay purposeful rather than compensatory (Do Hand Grippers Really Work?).
Step-by-Step Self-Assessment Process
- Set up the camera for a clear side or front view before the set.
- Perform the set with your normal planned load and tempo.
- Immediately review the footage against the checklist for that pattern.
- Note any points that deviate (spine position, knee tracking, range, control).
- Compare the video to a trusted technique reference if uncertainty remains.
- Decide whether the set meets the “good enough” standard (consistent, controlled, pain-free).
- If it does not, reduce load or range and correct the specific fault in the next set.
- Log the assessment briefly (“good,” “minor knee cave on last reps,” etc.).
- Re-film the same exercise the following session to confirm improvement.
- Once the pattern is consistently solid, reduce filming frequency to periodic checks.
What “Good Enough” Actually Looks Like
Form does not need to be perfect by competitive standards. It needs to be:
- Repeatable across the entire set
- Free of sudden deviations or loss of balance
- Pain-free during and after the session
- Aligned with the major technical points of the pattern
- Controlled through both the lowering and lifting phases
If these criteria are met, the form is good enough to support progressive training.
Tools and Methods Beyond Video
Mirrors
Useful for real-time cues on some lifts, but limited for side-view spinal position and often change natural movement. Use as a supplement, not the primary tool.
Body-feeling checklist
After a set, ask: Did any joint feel stressed? Did the target muscles do the work? Did balance stay secure? Subjective feeling plus video is more powerful than either alone.
Load and tempo as diagnostic tools
If form only breaks down when the load increases or the tempo speeds up, the current technique is not yet robust enough for that intensity.
Trusted visual references
Compare your footage to high-quality demonstrations from reputable coaches or educational resources. Focus on the key positions rather than cosmetic details.
Common Form Faults and Self-Corrections
| Fault | How It Appears on Video | Quick Self-Correction |
|---|---|---|
| Rounded lower back on hinge | Loss of neutral spine | Reduce range, brace harder, hinge more from hips |
| Knees caving on squat | Knees move inward | Push knees outward in line with toes, reduce load |
| Excessive elbow flare on press | Elbows far from body | Tuck elbows slightly, control the path |
| Shrugging on rows | Shoulders rise toward ears | Initiate with scapula, keep shoulder down |
| Momentum on any lift | Jerky or swinging motion | Slow the tempo, reduce load |
| Partial range that shortens over the set | Depth decreases | Choose a depth you can maintain for all reps |
When to Seek External Feedback
Self-assessment is highly effective for most trainees, but external input is valuable when:
- Pain persists despite regressions
- A fault remains after several weeks of focused correction
- You are preparing for higher loads or more complex variations
- Uncertainty about a specific joint position continues
A single form-check session with a qualified professional can accelerate progress and provide peace of mind.
Integrating Form Checks into Ongoing Training
In the first 4–8 weeks, film key sets every session. Once patterns are solid, move to weekly or bi-weekly checks, or film whenever loads increase significantly. Form review should remain a permanent, low-time-cost habit rather than a temporary beginner phase.
Strength training produces the best results when technique and progressive overload advance together (strength training guidance). Practical home-gym approaches emphasise systems that allow trainees to improve independently (home gym equipment prioritisation and budget home gym principles).
Frequently Asked Questions
How often should I film my lifts?
Every session during the first month or two, then weekly or whenever you add load or notice something feels different.
Which angle is most important?
Side view for squats, hinges, and presses. Front or slight 45-degree view for rows and single-leg work.
What if my form looks different from online videos?
Individual proportions vary. Focus on the major safety and effectiveness points (neutral spine, controlled path, joint alignment) rather than identical appearance.
Can I rely only on how the lift feels?
Feeling is useful but incomplete. Video reveals positions that proprioception often misses.
Is slow motion helpful?
Yes for detailed review of joint positions and timing. Real-time review is better for overall flow and balance.
What if I see multiple faults?
Correct one fault at a time, starting with the one that most affects safety or the main training effect.
Does good form mean I will never get injured?
No single factor eliminates all risk, but consistent good form significantly reduces the likelihood of overuse and technique-related injuries.
Should I film warm-up sets or working sets?
Working sets are more informative because they show form under fatigue.
Final Recommendation
You can assess form effectively without a trainer by filming key sets, applying clear pattern-specific checklists, and requiring that technique be consistent, controlled, and pain-free before progressing. Set up a simple camera angle, review footage against the major technical points, and correct one fault at a time. Once the standard is met consistently, form is good enough to support safe progressive training.
Begin filming your main lifts this week, create a short checklist for each pattern you use, and review one or two sets after every session. When self-assessment becomes a regular habit, technique improves steadily and confidence rises with it. Start with the next training session—the ability to coach yourself is one of the most valuable skills a home trainee can develop.