Best Budget Flooring That Protects Both Your Joints and Your Floors
Quick Answer
The best budget flooring that protects both your joints and your floors is ¾-inch horse stall mats (or equivalent dense rubber mats) for lifting zones, paired with interlocking EVA foam or rubber-topped tiles for lighter areas. Stall mats deliver excellent impact absorption and subfloor protection at roughly $1.70–$2.50 per square foot, while quality foam tiles add cushioning for bodyweight work and mobility at even lower cost. Measure your space, prioritise thickness and density for the heaviest training zones, and install only what you need. This combination minimises joint stress, prevents floor damage, and stays affordable for most home gyms.
Why Flooring Is a Non-Negotiable for Joint and Floor Protection
Training on bare concrete, hardwood, or thin carpet creates two problems. First, repeated impact travels straight into your ankles, knees, hips, and lower back. Second, dropped dumbbells, kettlebells, or plates can crack, dent, or scratch the subfloor—repairs that cost far more than proper mats.
Good budget flooring solves both issues by providing shock absorption (joint protection) and a durable barrier (floor protection). The right material reduces cumulative stress on your body while shielding the surface underneath. Practical home-gym resources consistently rank flooring as one of the highest-leverage early investments because it improves safety, comfort, and equipment longevity at the same time.
Key Properties That Deliver Real Protection
| Property | Why It Matters for Joints | Why It Matters for Floors | Budget Target |
|---|---|---|---|
| Thickness | Greater cushion reduces peak impact forces | More material between weight and subfloor | ½–¾ inch for lifting zones |
| Density | Firm support prevents excessive “sinking” that stresses joints | Resists compression and permanent indentations | High-density rubber or quality EVA |
| Shock absorption | Lowers force transmitted to knees and spine | Absorbs energy from dropped weights | Rubber outperforms thin foam |
| Surface grip | Stable footing reduces compensatory movement | Prevents mats from sliding and exposing floor | Textured rubber or non-slip foam |
| Durability | Maintains cushioning over months/years | Continues protecting floors long-term | Vulcanised or layered rubber preferred |
Best Budget Flooring Options Compared
| Flooring Type | Approx. Cost per Sq Ft | Joint Protection | Floor Protection | Best Use Case | Main Drawbacks |
|---|---|---|---|---|---|
| Horse Stall Mats (¾”) | $1.70–$2.50 | Excellent | Excellent | Heavy lifting, racks, deadlift zones | Heavy, initial odour, visible seams |
| Interlocking Rubber Tiles (⅜–½”) | $2.00–$4.00 | Very Good | Very Good | Mixed training, cleaner look | Higher cost than stall mats |
| Rubber Rolls (⅜–½”) | $1.50–$3.50 | Very Good | Very Good | Larger continuous areas | Harder to install, less portable |
| EVA Foam Interlocking Tiles (½–¾”) | $1.00–$2.50 | Good (cushion) | Moderate | Bodyweight, yoga, mobility, light dumbbells | Compresses under heavy loads |
| Rubber-Topped Foam Hybrids | $2.00–$3.50 | Excellent balance | Good | General home gyms wanting comfort + durability | Varies by brand quality |
Horse stall mats remain the budget king for serious lifting. These 4×6-foot, ¾-inch vulcanised rubber mats (commonly sold at farm-supply stores) offer commercial-grade impact protection at the lowest cost per square foot. They excel under racks, benches, and free-weight areas.
EVA foam tiles win for pure affordability and joint comfort during bodyweight circuits, mobility work, or warm-ups. They are light, easy to install, and kind to knees and wrists, but they are not ideal directly under heavy barbell work.
Rubber tiles or rolls sit in the middle—better aesthetics and easier handling than stall mats, with solid protection for most home users.
How Thickness and Material Affect Joint Health
Thicker, denser flooring reduces the peak ground-reaction forces that travel up the kinetic chain. Standing, squatting, and hinging on concrete for months accumulates stress. A ¾-inch dense rubber mat meaningfully lowers that stress compared with thin foam or bare floors.
For dynamic movements (jumps, kettlebell swings, or higher-rep circuits) the cushioning effect is even more noticeable. Pairing good flooring with sound technique further protects joints—especially during pressing and raising patterns. Technique details for shoulder work appear in Bent Arms vs. Straight Arms in Lateral Raises, The Hidden Mistake in Lateral Raises, and 3 Lateral Raise Modifications. Grip-intensive carries and hangs also benefit from a stable, non-slip surface (Do Hand Grippers Really Work?).
Step-by-Step Guide to Choosing and Installing Budget Flooring
- Measure and map your space
Record the exact dimensions of the training zone. Separate heavy-lifting areas (rack, deadlift platform) from lighter zones (mobility, bodyweight, cardio). - Determine your training style
Heavy barbell work → prioritise ¾-inch stall mats or dense rubber.
Mostly dumbbells, kettlebells, and bodyweight → quality foam or hybrid tiles can suffice.
Mixed use → combine both. - Calculate coverage and budget
Multiply square footage by the cost per square foot of your chosen option. Add 10 % for cutting waste if using rolls or stall mats. - Select materials by zone
- Lifting platform / rack area: ¾-inch horse stall mats
- Surrounding area: interlocking rubber or EVA tiles
- Pure mobility corner: thicker foam tiles
- Prepare the subfloor
Sweep and clean thoroughly. On concrete, ensure it is dry. On wood, check for squeaks or soft spots. A thin underlayment can add extra vibration damping in apartments. - Install
- Stall mats: lay flat, butt edges tightly, allow time for odour to dissipate (ventilate well).
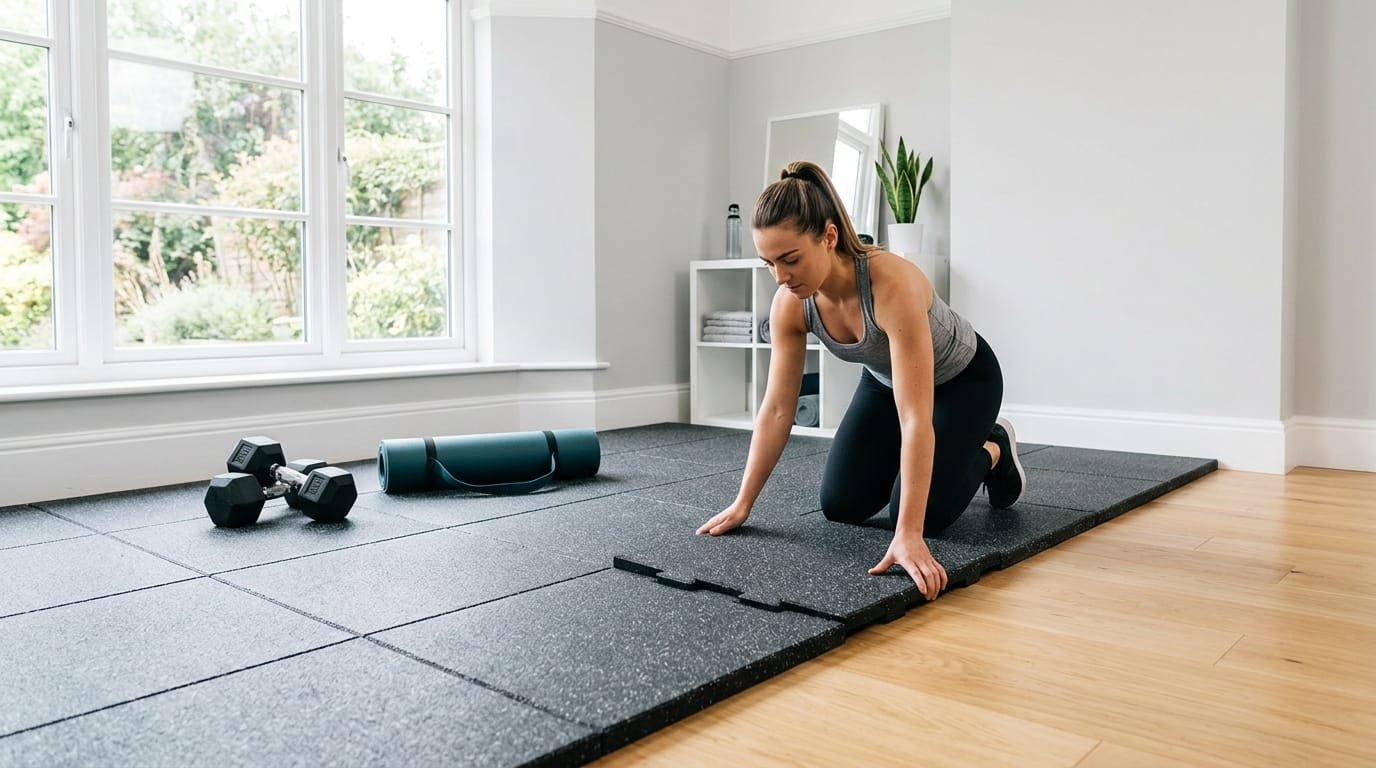
- Interlocking tiles: start in one corner and work outward; cut border pieces as needed.
- Rolls: cut to size, tape or adhesive if required.
- Test and adjust
Walk, squat, and set equipment on the new surface. Check for rocking, gaps, or excessive give. Add extra mats under high-impact spots if necessary. - Maintain
Sweep or vacuum regularly. Wipe spills promptly. Inspect seams and edges monthly.
Real-World Budget Examples
Small apartment lifting zone (80–100 sq ft)
Four to six stall mats under the main area + foam tiles for the rest ≈ $200–$350 total.
Garage gym (150–200 sq ft)
Stall mats covering the rack and platform + rubber or foam for the remainder ≈ $350–$550.
Mixed-use spare room
Rubber-topped interlocking tiles throughout for a cleaner look and balanced protection ≈ $300–$500.
These ranges stay well below the cost of repairing damaged flooring or dealing with joint issues later. Home-gym setup guides repeatedly emphasise that proper flooring protects both the athlete and the house (home gym equipment prioritisation and practical budget home gym principles).
Additional Benefits Beyond Protection
- Noise and vibration reduction (important in apartments or shared walls)
- Improved stability and confidence during lifts
- Cleaner, more professional training environment that encourages consistency
- Longer life for equipment (less wear from concrete abrasion)
Strength training itself delivers major benefits for muscle, bone, and metabolic health when performed on a supportive surface (strength training guidance).
Common Mistakes to Avoid
| Mistake | Consequence | Better Approach |
|---|---|---|
| Using only thin foam under heavy weights | Permanent compression, poor floor protection | Reserve foam for light zones; use dense rubber for lifting |
| Covering the entire room with stall mats unnecessarily | Extra cost, weight, and odour | Zone the flooring by training type |
| Ignoring initial odour of new rubber | Unpleasant training environment | Ventilate for 1–3 weeks before heavy use |
| Leaving gaps between mats | Trip hazard and exposed floor | Butt edges tightly or use interlocking designs |
| Skipping subfloor preparation | Mats shift or trap moisture | Clean and dry the surface first |
| Buying the absolute cheapest no-name foam | Rapid breakdown | Choose recognised density and thickness ratings |
Frequently Asked Questions
Are horse stall mats safe for finished indoor floors?
Yes when the subfloor is clean and dry. The mats themselves protect the floor; just ensure no grit is trapped underneath.
How long does the rubber smell last?
Typically 1–4 weeks with good ventilation. Some users wipe mats with vinegar solution or leave them outdoors initially.
Can I put stall mats over carpet?
Not ideal. Carpet compresses unevenly. A plywood platform under the mats works better if carpet cannot be removed.
Is ½-inch flooring enough for deadlifts?
It helps, but ¾-inch dense rubber provides meaningfully better protection for both joints and floors during heavier pulls and drops.
Do I need flooring under a treadmill or cardio machine?
Yes. A dedicated equipment mat or rubber section reduces vibration, noise, and floor wear.
How do I clean budget gym flooring?
Sweep or vacuum regularly. Use mild soap and water for deeper cleaning. Avoid harsh solvents that can degrade rubber or foam.
Will budget flooring work on a second storey?
Yes, especially with an added underlayment for vibration control. Thicker rubber still helps dampen sound.
Can I move the flooring later?
Interlocking tiles and stall mats are relatively portable. Rolls are harder to relocate once cut and installed.
Final Recommendation
For most people seeking budget flooring that protects both joints and floors, start with ¾-inch horse stall mats in the primary lifting zone and add interlocking EVA or rubber-topped tiles for the surrounding area. This combination delivers excellent impact absorption, solid subfloor protection, and manageable cost. Measure your space, zone the flooring according to training demands, install carefully, and maintain it with simple cleaning habits.
Proper flooring reduces joint stress, prevents expensive floor damage, and makes every session more comfortable and stable. Pair it with good movement technique and progressive training for the best long-term results.
Calculate your square footage this week, choose dense rubber for the heavy areas, and install a protective surface before the next training block. The investment is modest compared with the ongoing benefits to your body and your home.