Crow Yoga Pose Challenges? The Hidden Messages from Your Body
Quick answer: Crow pose (Bakasana) is an arm-balancing yoga pose that most people find challenging not because of raw strength, but because of a few specific, fixable technique issues — particularly sinking hips, elbows splaying outward, and insufficient wrist preparation. Addressing these directly, along with dedicated prep poses, makes the pose achievable for most practitioners without years of practice.
Researched and written by the GymGoodies team, fact-checked against manufacturer specs and current fitness guidance.
Crow pose has a reputation as one of yoga’s classic “someday” poses — something practitioners work toward for months before finally holding it. The good news: most people who struggle with Bakasana are running into the same handful of identifiable technique issues, not a fundamental lack of strength or ability.
What Crow Pose Actually Requires
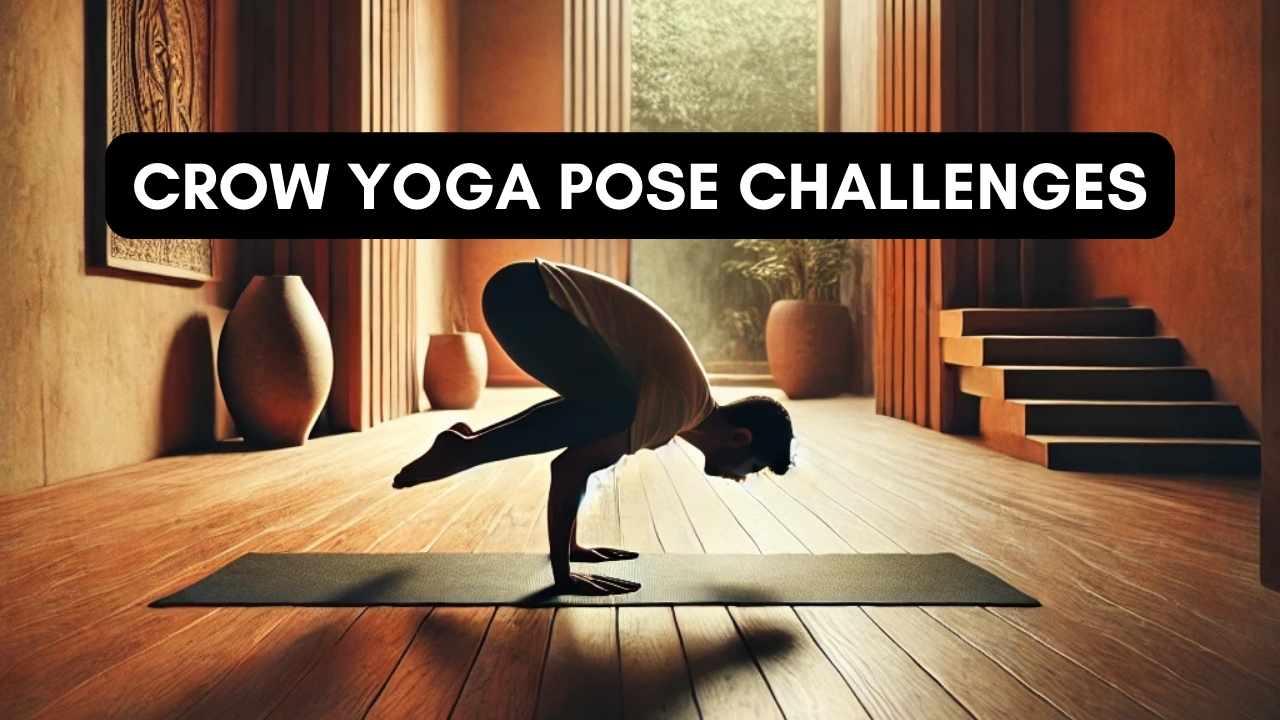
According to Wilmington Yoga Center, Bakasana strengthens the hands, arms, shoulders, inner thighs, and abdominal muscles while building physical and mental balance — it’s often taught early in yoga classes specifically because it requires significant strength and serves as a foundational pose for more advanced arm balances later on.
Step-by-Step: How to Practice Crow Pose
- Begin in a squat with feet close together, knees wide
- Place your palms flat on the floor, shoulder-width apart, fingers spread wide with pressure through your fingertips, not just your palms
- Bend your elbows slightly (avoid locking them straight or letting them splay outward)
- Rest your knees against the backs of your upper arms, as high toward your armpits as comfortable
- Shift your weight forward into your hands, lifting your hips
- Come up onto the balls of your feet, then lift one foot at a time, or both together if you feel ready
- Draw your heels toward your glutes and squeeze your inner thighs against your arms for stability
- Keep your gaze slightly forward, not straight down, which helps prevent tipping forward
The Most Common Mistake: Sinking Hips
According to yoga teacher Leah Sugerman, one of the most common mistakes in crow pose is allowing your hips to sink down toward the floor — this works with gravity to pull you downward, which is the opposite of what you want in any arm balance. The fix is thinking about actively lifting and resisting gravity, rather than simply holding a static position; the higher your hips lift and the more your core and hip muscles engage, the easier the pose becomes to sustain.
Second Common Mistake: Elbows Splaying Outward
According to Olaben’s guide to crow pose, letting your elbows splay outward adds unnecessary pressure to your wrists and increases injury risk — keeping your elbows tracking in line with your shoulders, rather than winging out to the sides, both protects your wrists and creates a more stable structural base for the pose.
Third Common Mistake: Insufficient Wrist Preparation
Since crow pose places significant weight through your wrists in an extended position, inadequate wrist mobility or strength is a genuine limiting factor for many practitioners — not just a strength issue elsewhere in the body. According to Dynamic Yoga Anatomy, wrist limitations in Bakasana generally come down to one of two issues: either your wrist and hand muscles aren’t strong enough to control the joint angle under load, or they’re too tight to allow adequate wrist extension in the first place — often related to prolonged computer and desk work tightening these muscles over time.
Prep Poses to Build Toward Crow Pose
Rather than attempting the full pose cold, dedicated preparation work addresses the specific strength and mobility demands involved:
- Wrist circles and stretches — gently mobilize and warm up the wrist joint before loading it
- Malasana (Garland Pose) — the deep squat starting position for crow pose; practicing this alone builds hip and ankle mobility
- Plank pose holds — builds the core and shoulder stability needed to support your body weight on your hands
- Boat pose (Navasana) — strengthens the hip flexors and core muscles that help lift and control your legs in crow pose
- Forearm or hand-supported cat-cow with wrist rounding — specifically prepares the wrist for the angle it needs to tolerate in Bakasana
Who Should Be Cautious or Avoid This Pose
According to Wilmington Yoga Center’s guidance, Bakasana should be avoided by people with recent or chronic injury or inflammation of the wrists or shoulders, and by those with carpal tunnel syndrome. Pregnant practitioners should also avoid this pose. If you fall into any of these categories, or have any current wrist or shoulder pain, it’s worth speaking with a doctor or an experienced instructor about appropriate modifications or alternative poses before attempting crow pose.
Practical Safety Tips for Beginners
- Practice near a cushion, block, or folded blanket placed in front of you, so you have a soft landing spot if you tip forward while learning
- Try lifting just one foot at a time initially, rather than attempting to lift both feet simultaneously right away
- Don’t rush toward holding the pose for a long duration — even a brief, controlled lift with good form is a meaningful milestone worth building from, rather than something to dismiss because it wasn’t sustained for a full breath cycle
How This Connects to Broader Balance and Strength Training
Crow pose is fundamentally a balance and core-stability challenge dressed up as an arm balance — the actual mechanics rely heavily on core engagement and body awareness, not just arm strength alone. If you’re specifically working on balance as part of a broader fitness or healthy-aging goal, our guide on yoga poses for graceful aging covers gentler, more foundational balance work that builds toward more challenging poses like this one over time.
A Realistic Timeline for Progress
Since crow pose combines several specific requirements — wrist mobility and strength, core stability, hip mobility, and confidence with weight-bearing on your hands — it’s genuinely normal for this pose to take weeks to months of consistent practice to achieve, even for otherwise fit and flexible practitioners. Isolating and specifically practicing the prep poses above, rather than only repeatedly attempting the full pose, tends to accelerate progress more than attempting the complete pose in every practice session.
Common Mistakes to Avoid While Practicing
- Practicing exclusively the full pose without dedicating separate time to prep work and specific weak points (wrist mobility, core strength).
- Rushing past wrist warm-up, given how central wrist positioning is to both success and injury prevention in this pose.
- Looking straight down at the floor rather than slightly forward, which can contribute to tipping forward out of the pose.
- Getting discouraged by inconsistency — arm balances like crow pose often feel achievable one day and elusive the next, which is a normal part of the learning process rather than a sign of regression.
Frequently Asked Questions
How long does it typically take to learn crow pose?
This varies widely by individual, but consistent practice — including dedicated prep work — over several weeks to a few months is a reasonable general expectation for most practitioners.
Is crow pose safe if I have wrist pain?
Not generally recommended if you have current wrist pain, injury, or inflammation — this is specifically flagged as a contraindication by yoga instructors, and it’s worth consulting a doctor or experienced teacher about modifications or alternative poses in this situation.
Do I need to be very flexible to do crow pose?
Strength, core stability, and wrist mobility matter more than general flexibility for this particular pose — it’s less about being flexible overall and more about the specific mechanical requirements covered above.
Bottom Line
Crow pose is challenging but achievable for most practitioners once you address the specific, identifiable issues that commonly hold people back — sinking hips, splaying elbows, and inadequate wrist preparation. Dedicated prep work targeting these exact areas, combined with patience and appropriate caution if you have any wrist or shoulder issues, is a far more effective path to this pose than repeatedly attempting the full version alone.
How’s your crow pose journey going? Let us know in the comments which part of the pose has been the biggest challenge for you — hips, wrists, or balance.