How to Perform Safe Lateral Raises if You Have Shoulder Impingement History
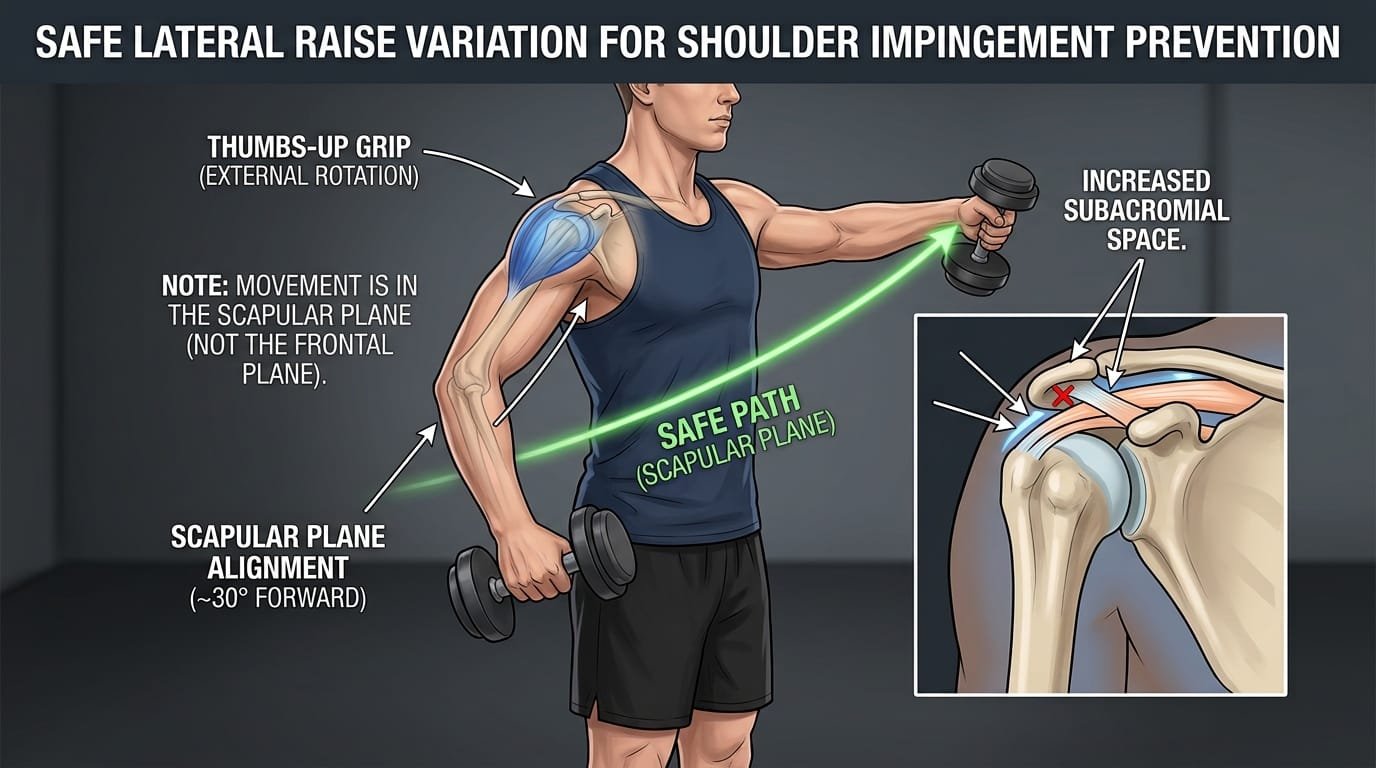
Quick Answer If you have a history of shoulder impingement, you can still perform lateral raises safely by making three key changes: (1) raise the arms in the scapular plane (30–45° forward of pure side raise) instead of the frontal plane, (2) keep the thumbs pointing up or slightly forward (external rotation) rather than down, and (3) limit the range of motion to roughly 70–90° or stop before any pinching sensation. These modifications increase subacromial space, reduce compression on the rotator cuff tendons, and allow progressive loading of the lateral deltoid without re-irritating the shoulder. Always stay completely pain-free during the set and for 24–48 hours afterward.
Why Lateral Raises Often Aggravate Shoulder Impingement
Shoulder impingement (subacromial impingement syndrome) occurs when the tendons of the rotator cuff—especially the supraspinatus—and the subacromial bursa are repeatedly compressed between the head of the humerus and the acromion process of the scapula. The classic “painful arc” sits between approximately 60° and 120° of arm elevation.
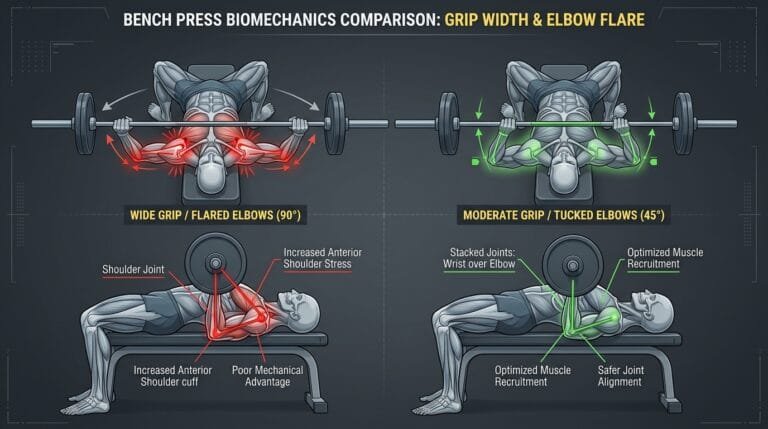
Traditional lateral raises performed in the pure frontal plane with the arms internally rotated (thumbs pointing down or palms facing the floor) drive the greater tuberosity of the humerus upward into the acromion. This narrows the already limited subacromial space and recreates the exact mechanical stress that caused the original irritation. Over time, this can lead to tendinopathy, bursitis, or re-injury.
Fortunately, the movement itself is not the problem—the specific execution is. Biomechanical research and clinical practice consistently show that changing the plane of motion, the rotation of the humerus, and the range of motion dramatically alters joint loading. Your earlier article on straight-arm lateral raises already flagged many of these risks; this guide expands into practical, progressive solutions that let you keep training the lateral deltoids productively.
The Three Non-Negotiable Safety Principles
1. Scapular Plane Instead of Frontal Plane The scapulae sit on the ribcage at roughly a 30–45° forward angle. When you raise the arms in this same plane, the humeral head tracks more naturally under the acromion and the subacromial space remains more open. Pure frontal-plane raises force the shoulder into a less congruent position and increase compression risk. Analyses from sources such as Dr. Gains and clinical reviews support the scapular plane as the default for anyone with previous impingement.
2. External Rotation (Thumbs Up or Neutral) Pointing the thumbs toward the ceiling or slightly forward keeps the greater tuberosity from jamming into the acromion. Internal rotation (thumbs down) is one of the fastest ways to recreate impingement mechanics. This single cue alone resolves discomfort for many lifters.
3. Limited, Pain-Free Range of Motion Stop at or below shoulder height (approximately 70–90°) or earlier if any pinching appears. Partial-range work still places meaningful mechanical tension on the lateral deltoid. Raising past the point of comfort offers diminishing returns and rising risk.
Additional supporting principles include leading with the elbows rather than the hands, using controlled tempos, and selecting loads that allow perfect form for 10–15+ repetitions.
Detailed Step-by-Step Technique for Safe Lateral Raises
- Stand with feet roughly hip-width, knees soft, and core lightly braced.
- Hold light dumbbells at your sides with a neutral or thumbs-up grip.
- Soften the elbows 10–20° and lock that angle for the entire set.
- Initiate the raise by leading with the elbows while traveling in the scapular plane (30–45° forward of pure side).
- Keep the shoulder blades gently depressed and avoid shrugging.
- Raise only as high as you can without any pinching, clicking, or sharp discomfort—usually 70–90°.
- Pause briefly at the top while maintaining tension.
- Lower under control for 2–3 seconds, feeling the deltoid lengthen.
- Reset scapular position between reps if needed.
- Complete the prescribed repetitions, then rest and repeat.
Film yourself from the front and side during the first few sessions. Small deviations in plane or rotation are easy to miss without video feedback.
Comparison Table: Risky vs. Safer Execution
| Variable | Higher-Risk Version | Safer Version for Impingement History | Why It Matters |
|---|---|---|---|
| Plane of motion | Pure frontal (straight out to sides) | Scapular plane (30–45° forward) | Increases subacromial clearance |
| Hand/thumb position | Thumbs down / palms facing floor | Thumbs up or neutral | Prevents greater tuberosity from rising into acromion |
| Range of motion | Above 90–100° or to failure | Stop at or below 90° (or earlier) | Avoids the peak compression zone |
| Elbow action | Locked straight or excessive swing | Soft, fixed elbow angle; lead with elbows | Reduces unwanted internal rotation and momentum |
| Load & tempo | Heavy, fast, momentum-driven | Light–moderate, 2–3 second lowering | Keeps stress on muscle rather than joint |
| Body position | Upright with possible trap shrugging | Slight lean or supported variations | Improves leverage and reduces compensatory tension |
Proven Safe Variations (Ranked by Usefulness)
1. Scapular-Plane Dumbbell Lateral Raise The foundational modification. Arms travel 30–45° forward with thumbs up. Most people can return to productive training with this single change.
2. Leaning Single-Arm Lateral Raise Hold a rack or sturdy object with the non-working hand and lean the torso slightly away. This alters the line of pull and frequently eliminates pinching entirely. Coaches working with injury-prone clients often default to this variation.
3. Low-Anchor Cable Lateral Raise Constant tension and the ability to stop at any height. Set the cable low, step out, and raise in the scapular plane. Excellent for controlled progressive overload.
4. Chest-Supported or Incline Lateral Raise Lying face-down on an incline bench removes momentum and forces strict form. Particularly useful during the reintroduction phase.
5. Partial-Range or Pulsing Lateral Raises Stay in the bottom two-thirds of the range where irritation is lowest while still loading the muscle effectively.
6. Y-Raises / Scaption Raises Low-load alternatives that emphasize upward rotation and lower-trapezius contribution. Ideal as a warm-up or temporary substitute when even modified lateral raises feel provocative.
Programming Guidelines After Impingement
- Frequency: 2 sessions per week initially.
- Volume: 2–4 sets of 10–15 (or even 15–20) controlled repetitions.
- Load: Choose a weight that feels almost too light on the first set. Progress only when every rep is symptom-free.
- Tempo: 2–3 second eccentric, brief pause at the top.
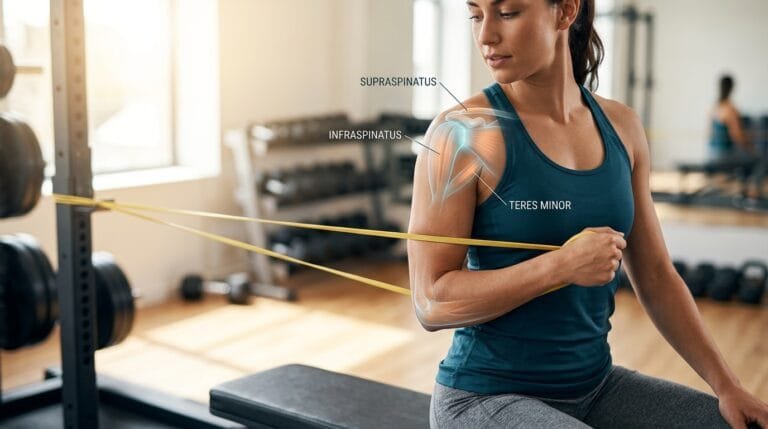
- Pairing: Always combine with rotator-cuff and scapular work (face pulls, side-lying external rotations, serratus punches, band pull-aparts).
- Monitoring: Track how the shoulder feels during the session and 24–48 hours later. Delayed onset of pinching or ache is a clear signal to reduce range or load.
- Progression: Increase range of motion first, then load, then volume—never all three at once.
A sample reintroduction micro-cycle might look like: Week 1–2: Scapular-plane raises to 70°, very light load, higher reps. Week 3–4: Same plane, gradually approach 80–90° if pain-free. Week 5+: Introduce leaning or cable variations and slowly increase load.
Supporting Mobility and Stability Work
Safe lateral raises are only one piece of long-term shoulder health. Address the common contributors to impingement:
- Limited thoracic extension
- Tight pectoralis minor
- Weak serratus anterior and lower trapezius
- Poor rotator-cuff endurance
- Excessive upper-trapezius dominance
Daily or every-other-day soft-tissue work, thoracic foam rolling, and controlled scapular drills accelerate recovery and raise the threshold for future irritation. Strength-and-conditioning literature, including reviews in the Strength and Conditioning Journal, supports exercise modification combined with targeted mobility and stability training.
Integrating Lateral Raises with the Rest of Your Training
Modified lateral raises pair productively with pressing work using adjustable dumbbells or kettlebells. Strong grip endurance helps you maintain control of the dumbbells without compensatory tension creeping into the neck and traps. Core stability from ab roller variations or hanging work supports a braced torso during standing raises.
Recovery tools such as a budget massage gun can help manage residual upper-trap, deltoid, and forearm tightness. Light cardio on a manual treadmill or mobility flows with resistance bands aid recovery between sessions. Continue to reference your lateral raise form guide for additional context on common errors that aggravate the shoulder.
Common Mistakes That Re-Irritate the Shoulder
- Returning too quickly to pure frontal-plane raises because “it feels more like a side delt exercise”
- Using excessive weight and swinging the dumbbells
- Raising past the first sign of discomfort
- Allowing the thumbs to turn downward during the raise
- Shrugging the traps instead of isolating the deltoid
- Ignoring mild post-session pinching or residual ache
- Adding volume or range before the current workload is fully tolerated
Frequently Asked Questions
Can I ever return to traditional straight-arm lateral raises? Possibly, once you have full pain-free range, solid scapular control, and no residual symptoms. Many lifters permanently prefer the scapular-plane version because it feels better and still builds excellent lateral delts. Clinical modification strategies are discussed in resources such as those from the National Strength and Conditioning Association.
Is the scapular plane less effective for building the side delts? It slightly increases anterior-delt contribution, but the lateral deltoid remains the primary mover. The safety trade-off is almost always worth it. Practical explanations appear in analyses from Dr. Gains and coaching literature.
How light should the weight be when restarting? Start with a load you can control for 15+ clean, slow repetitions with zero discomfort. Progress only when the current weight feels easy and the shoulder remains quiet for 48 hours afterward.
Should I stretch the shoulder aggressively before lateral raises? Gentle thoracic and pectoralis minor mobility work is helpful. Aggressive end-range stretching of an irritated shoulder is usually counterproductive and can increase symptoms.
When should I see a professional? If pain persists despite consistent modifications, worsens, or is accompanied by weakness, night pain, clicking, or progressive loss of range, consult a qualified physical therapist or sports-medicine provider. Early intervention prevents chronic problems.
Can I still train shoulders hard with these restrictions? Yes. By combining modified lateral raises with face pulls, rear-delt work, external rotations, and pressing variations that stay below the painful arc, you can continue making excellent progress while protecting the joint.
Final Recommendation
A history of shoulder impingement does not mean you must abandon lateral raises forever. By shifting into the scapular plane, maintaining external rotation, limiting range to a pain-free arc, and using controlled loads, you can continue developing the lateral deltoids while protecting the joint. Treat these modifications as the new default rather than temporary restrictions.
Start conservatively, prioritize perfect technique, and progress only when the shoulder remains completely quiet during and after training. Combine the adjusted lateral-raise variations with supportive scapular and rotator-cuff work for the best long-term outcome. Your shoulders can become both stronger and more resilient when loading is applied intelligently.
Master the safe version first. Once tolerance is high, you may explore greater range or load if desired—always guided by comfort and function rather than ego. Consistent, pain-free training over months produces better results than aggressive loading that repeatedly flares symptoms.