Weighted Vest Training: Who It Actually Helps and Who Should Skip It
Quick Answer
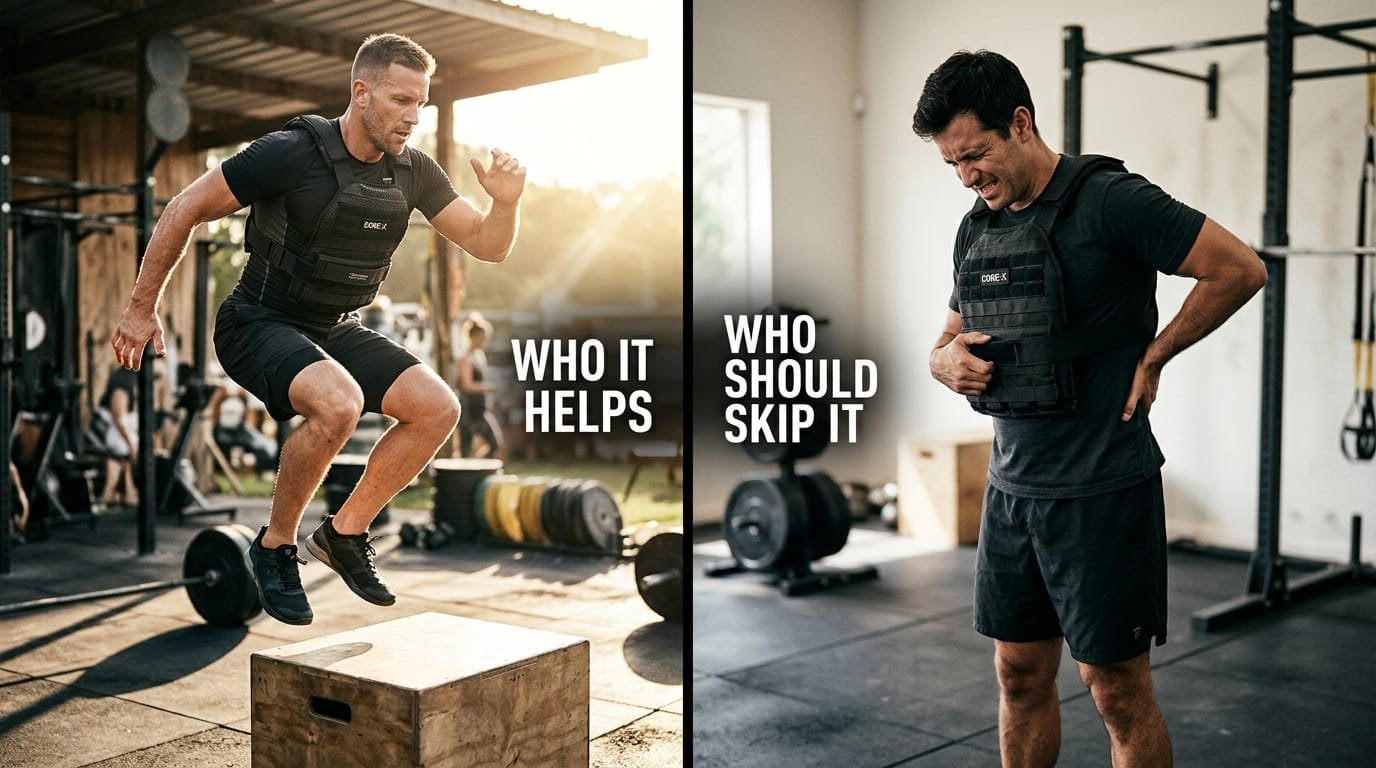
Weighted vest training helps intermediate and advanced trainees who need progressive overload for bodyweight exercises, walking, hiking, or conditioning without adding heavy free weights or complex equipment. It is most useful for increasing intensity of push-ups, pull-ups, squats, lunges, and loaded carries while keeping the hands free. Beginners with incomplete movement patterns, people with uncontrolled joint pain (especially knees, hips, or spine), those with balance or stability limitations, and anyone returning from recent injury should generally skip or delay weighted vest use until foundational strength and technique are solid.
What Weighted Vest Training Actually Does
A weighted vest adds external load distributed across the torso. Unlike holding dumbbells or a barbell, the hands remain free and the load sits close to the body’s centre of mass. This makes it effective for increasing the difficulty of bodyweight movements and low-impact conditioning while preserving natural movement patterns. The vest increases mechanical tension and cardiovascular demand without requiring additional equipment setup. However, the same axial loading that creates the training stimulus also increases stress on the spine, shoulders, and lower extremities. Understanding who benefits and who does not prevents misuse.
Who Weighted Vest Training Helps Most
| Trainee Profile | Primary Benefit | Why the Vest Works Well | Recommended Starting Approach |
|---|---|---|---|
| Intermediate calisthenics trainees | Progressive overload for push-ups, dips, rows, pull-ups | Adds load without changing movement pattern | 5–10% of body weight, controlled reps |
| Hikers and walkers seeking higher intensity | Increased caloric demand and leg strength | Hands-free loading during long-duration activity | Light vest, gradual time increase |
| Home lifters with limited free weights | Extra stimulus for squats, lunges, and carries | Bridges the gap when dumbbells are light | Short sets of compound movements |
| Conditioning-focused trainees | Higher work capacity in circuits | Elevates heart rate while preserving movement quality | Short intervals, moderate load |
| Military or tactical fitness enthusiasts | Sport-specific loading | Mimics gear weight during training | Progressive load matching demands |
Shoulder-friendly technique remains important when the vest is worn during upper-body work (Bent Arms vs. Straight Arms in Lateral Raises, The Hidden Mistake in Lateral Raises, and 3 Lateral Raise Modifications). Grip strength still develops through hanging and carrying variations and can be trained directly (Do Hand Grippers Really Work?).
Who Should Skip or Delay Weighted Vest Training
| Profile | Main Risk | Better Alternative | When Reconsideration Is Reasonable |
|---|---|---|---|
| Absolute beginners | Reinforcing poor movement patterns under load | Master bodyweight technique first | Once form is consistent and pain-free |
| People with active knee, hip, or spinal pain | Increased compressive and shear forces | Pain-free bodyweight or band work | After symptoms resolve and control improves |
| Individuals with balance or vestibular issues | Higher fall risk under added mass | Supported or seated variations | When stability is reliable |
| Recent injury or post-surgical trainees | Premature loading of healing tissues | Therapist-guided progressions | Full clearance and demonstrated capacity |
| Those who already use heavy free weights effectively | Redundant loading with less precision | Continue linear free-weight progression | When seeking variety or specific carry work |
| Trainees unable to control eccentric tempo | Excessive joint stress | Slow bodyweight work first | Once tempo control is automatic |
Core Principles for Safe and Effective Vest Use
- Technique before load – Own the movement without the vest first.
- Start very light – 5–10% of body weight is sufficient for most new users.
- Progress one variable at a time – Increase duration, then repetitions, then load.
- Keep the spine neutral – Avoid excessive arching or rounded postures under load.
- Monitor joint response – Any new or increasing pain is a signal to regress.
- Prioritise controlled tempos – Especially on the lowering phase of strength movements.
- Use the vest as a tool, not a constant – Not every session requires it.
Best Uses of a Weighted Vest
Bodyweight Strength Progressions
- Push-ups and variations
- Inverted rows or pull-up progressions
- Squats, split squats, and lunges
- Glute bridges and hip thrusts
- Plank variations and short carries
Conditioning and Work Capacity
- Brisk walking or incline walking
- Hiking
- Dense bodyweight circuits
- Stair climbing (if joints tolerate it)
Loaded Carries and Postural Work
- Farmer-style walks with the vest
- Posture-focused marching or rucking
The vest is less ideal for maximal strength attempts, Olympic lifting variations, or any movement where the added torso load compromises technique or breathing.
Step-by-Step Introduction Protocol
- Confirm foundational capacity
Perform the target movements with solid technique and no pain for multiple sessions. - Select a light starting load
Begin with 5–10% of body weight or the lightest usable vest configuration. - Test on simple movements first
Start with walking or basic bodyweight squats and push-ups. - Limit initial volume
Keep sets short and total vest time low (10–20 minutes total per session). - Evaluate response for 48 hours
Joint feeling, recovery, and next-day performance should remain stable or improve. - Progress gradually
Add time or repetitions before increasing weight. Small load jumps are safer than large ones. - Integrate into existing programs
Use the vest on selected exercises rather than every movement. - Maintain non-vest training
Continue pure bodyweight and free-weight work to preserve movement quality and loading variety. - Reassess monthly
Confirm that the vest is still producing progress without joint irritation. - Deload or remove when needed
If recovery declines or form deteriorates, reduce load or return to unloaded variations.
Sample Vest Progressions
Push-Up Progression
- Unloaded push-ups with strong form
- Vest at 5–10% body weight for 3 sets of manageable reps
- Increase reps, then load, while keeping tempo controlled
Walking / Rucking Progression
- Unloaded brisk walking
- Light vest for 20–30 minutes
- Gradual increases in time, then incline or load
Lower-Body Progression
- Bodyweight split squats or reverse lunges
- Light vest for controlled sets
- Progress via reps, tempo, or small load increases
Common Mistakes That Turn a Useful Tool into a Problem
| Mistake | Result | Better Approach |
|---|---|---|
| Starting too heavy | Joint stress and form breakdown | Begin at 5–10% body weight |
| Adding the vest before technique is solid | Reinforced compensations | Master unloaded movement first |
| Using the vest for every exercise | Excessive systemic and joint fatigue | Apply selectively |
| Ignoring pain signals | Escalation of irritation | Regress immediately |
| Progressing load too quickly | Overuse symptoms | Advance one variable at a time |
| Poor vest fit | Chafing, shifting load, altered posture | Choose adjustable, snug designs |
Equipment Considerations
A good weighted vest should:
- Fit snugly without restricting breathing
- Distribute load evenly
- Allow incremental loading
- Remain stable during dynamic movement
- Be comfortable enough for the intended duration
Short, adjustable vests that sit high on the torso are generally preferable to long, swinging designs for most strength applications.
Alternatives When a Vest Is Not Appropriate
- Slow eccentrics and paused bodyweight variations
- Unilateral free-weight work
- Resistance bands for accommodating resistance
- Dumbbell or kettlebell loading for the same patterns
- Incline or tempo walking without added load
These methods often solve the same progression problems with lower axial stress.
Integration with Overall Home Training
Weighted vest work is a progression tool, not a complete training system. It pairs best with a foundation of free-weight or bodyweight strength training, adequate recovery, and joint-friendly programming. Use it to extend the runway of bodyweight movements or to increase the demand of walking and conditioning, then return to unloaded or free-weight work as the primary stimulus when appropriate.
Strength training remains highly effective when progressive overload is applied intelligently and joint health is protected (strength training guidance). Practical home-gym approaches emphasise choosing tools that match current capacity and constraints (home gym equipment prioritisation and budget home gym principles).
Frequently Asked Questions
How heavy should a weighted vest be for beginners to vest training?
Most people should start at 5–10% of body weight. Even lighter is appropriate if the movement is demanding or joint history is a concern.
Can weighted vests help build muscle?
Yes, by increasing mechanical tension on bodyweight movements. They are not superior to progressive free-weight loading for hypertrophy but are effective when free weights are limited.
Are weighted vests safe for walking every day?
Light vests can be used frequently if joints remain comfortable and recovery is adequate. Higher loads or long durations require more recovery attention.
Will a weighted vest hurt my back or knees?
It can if load, volume, or technique are inappropriate. Starting light, progressing slowly, and maintaining good posture significantly reduce risk.
Is a weighted vest better than a backpack for rucking?
A well-fitted vest usually distributes load more evenly and keeps the centre of mass closer to the body. A backpack is a viable alternative if a vest is unavailable.
Can I use a weighted vest if I have previous shoulder issues?
Proceed cautiously. The vest increases demand on the shoulder girdle during upper-body movements. Prioritise controlled technique and consider avoiding overhead positions initially.
How often should I train with a weighted vest?
Two to four sessions per week on selected exercises is sufficient for most people. More frequent use is possible with lighter loads and lower total volume.
When should I stop progressing the vest weight?
When further increases compromise technique, recovery, or joint comfort. At that point, return to free-weight progression or advanced bodyweight variations.
Final Recommendation
Weighted vest training helps intermediate and advanced trainees who need a practical way to overload bodyweight strength movements, walking, or conditioning while keeping the hands free. It is less suitable for absolute beginners, individuals with active joint problems, those with balance limitations, or anyone who has not yet mastered the underlying movement patterns. Start light, progress slowly, apply the vest selectively, and monitor joint response carefully.
Assess your current movement quality and joint status honestly. If technique is solid and joints are quiet, introduce a light vest on one or two movements and evaluate the response over a week. If any of the high-risk profiles apply, continue progressing with bodyweight leverage, tempo, and free-weight methods instead. When used by the right person under the right conditions, a weighted vest becomes a simple, effective tool for continued progress. When used too early or too heavily, it becomes an unnecessary source of irritation. Choose based on capacity rather than enthusiasm—the long-term results will be better for it.